

2. Creating the Storm View Instance
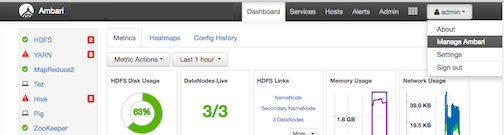
Browse to the Ambari Administration interface: from the dashboard, open the administrator account menu and click Manage Ambari:
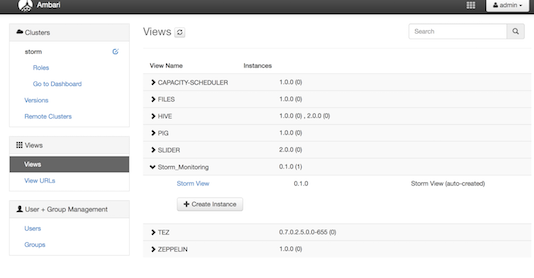
Click Views, expand the Storm_Monitoring menu, and click Create Instance:
On the Create Instance page, select the Version. If multiple Storm View versions are present, choose one.
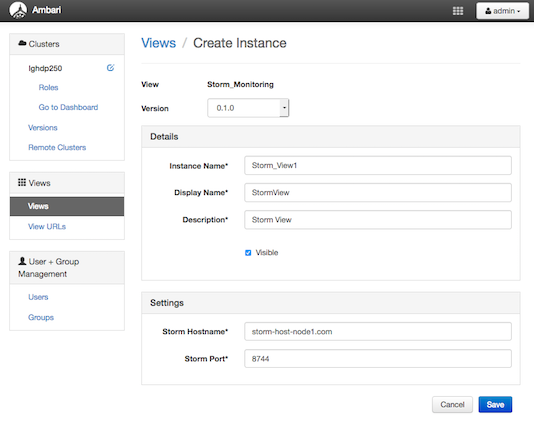
Enter the following view instance details:
Table 13.1. Storm View Instance Details
Property
Description
Example Value
Instance Name
This is the Storm view instance name. This value should be unique for all Storm view instances you create. This value cannot contain spaces, and it is a required setting.
Storm_View1Display Name
This is the name of the view link displayed to the user in Ambari Web.
StormViewDescription
This is the description of the view displayed to the user in Ambari Web.
StormViewEnter the following view instance settings:
Table 13.2. Storm View Instance Settings
Property
Description
Example Value
Storm Hostname This is the hostname where the Storm UI Server is running. storm-host-node1.comStorm Port This is the port where the Storm UI Server is listening. 8744Settings depend on cluster and deployment factors in your environment. You can typically leave the default settings unless you are using the Storm View with a Kerberos-enabled cluster. For more information, refer to the Ambari Security Guide and Configuring Views for Kerberos.
Click Save.